¶ Using Zubax GNSS with ArduPilot
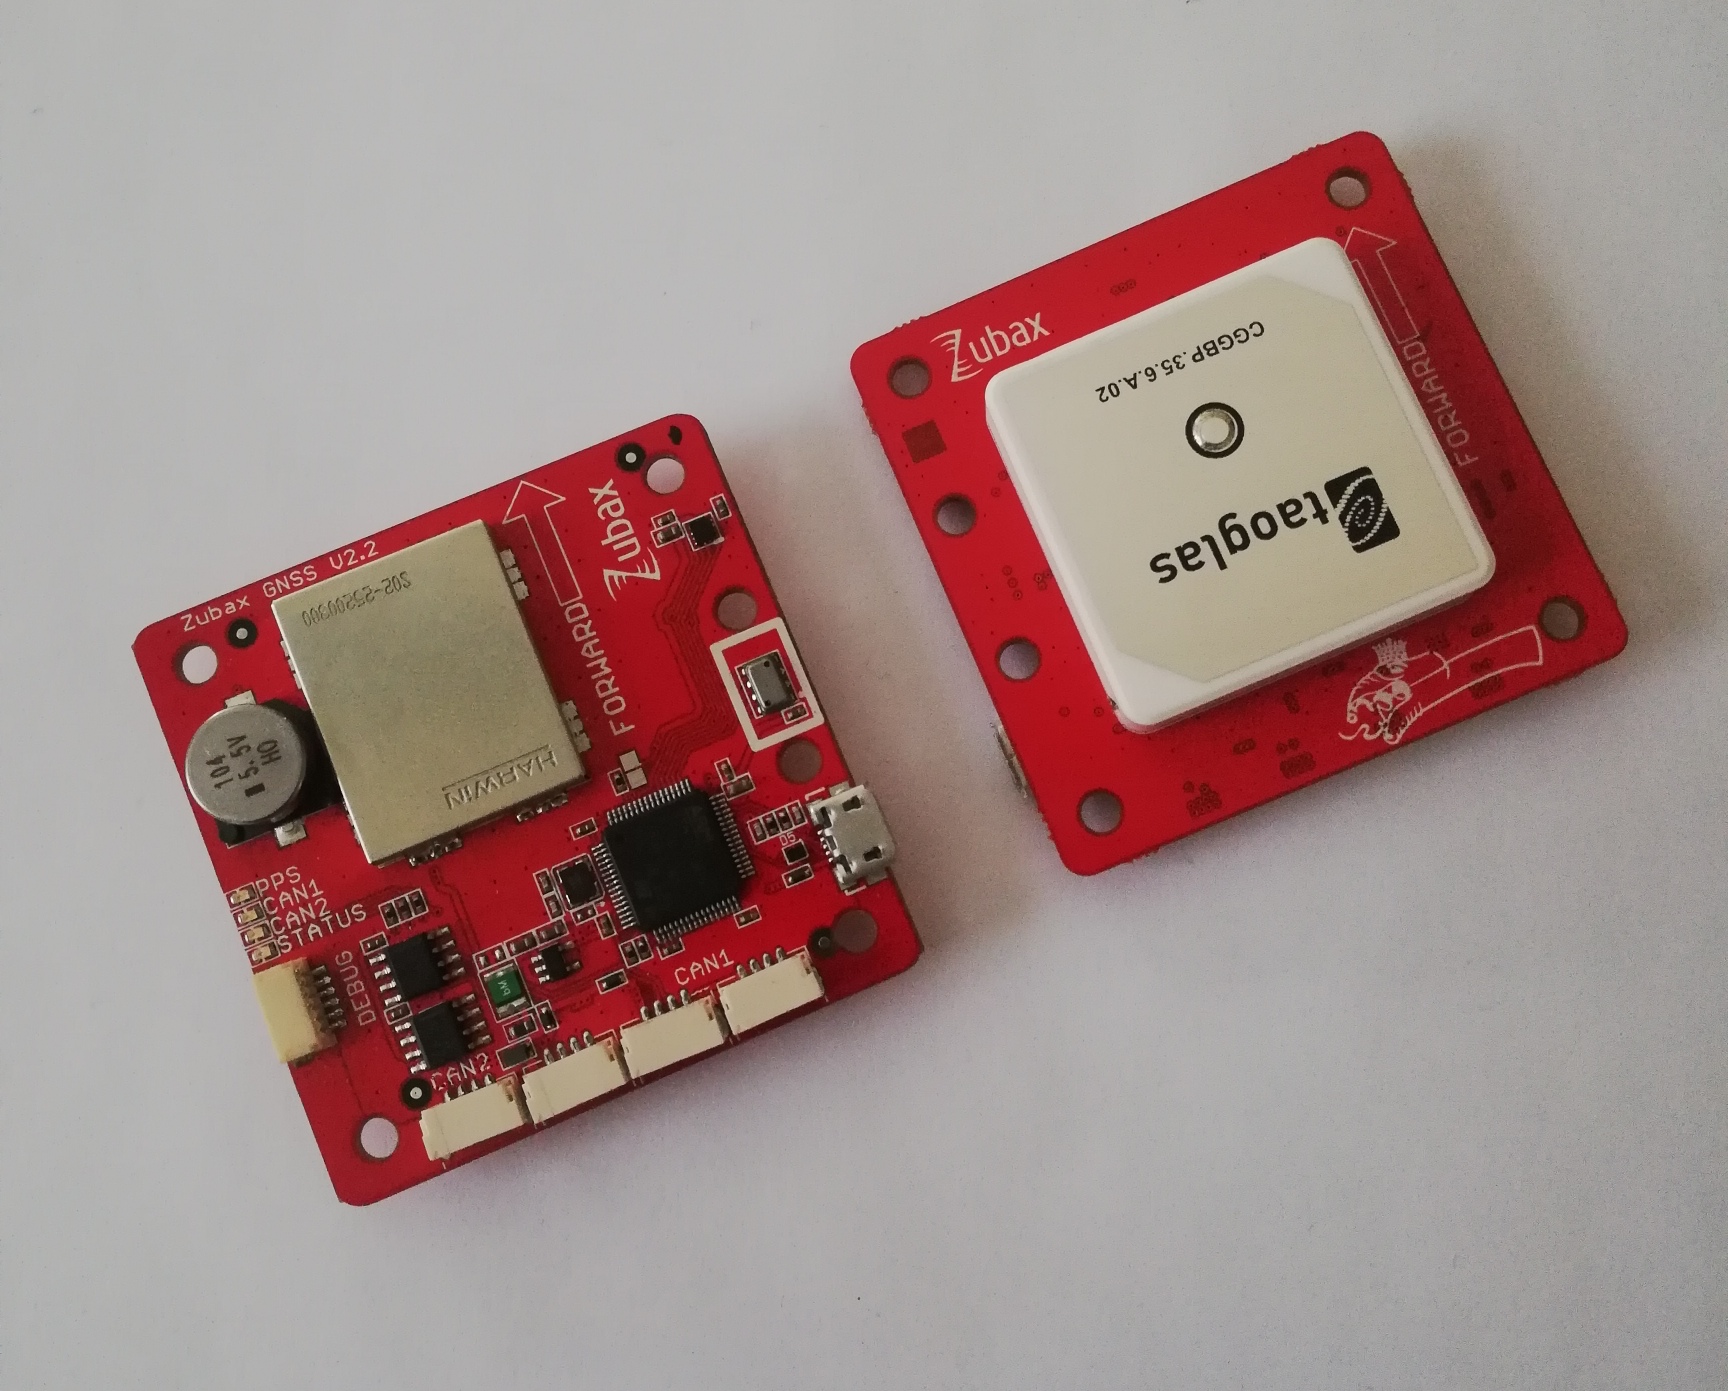
This tutorial demonstrates how to integrate Zubax GNSS 2 with ArduPilot based flight controllers using ArduPilot mission planner. The documentation for ArduPilot is available at ardupilot.org.
UAVCAN is supported in the following APM firmwares:
- ArduPlane 3.2.1 and newer
- ArduCopter 3.3rc1 and newer
¶ Software Installation
Mission Planner is a ground control station for Plane, Copter and Rover. It is compatible with Windows and can be used on GNU/Linux using mono. Mission Planner can be used as a configuration utility or as dynamic control supplement for your autonomous vehicle.
¶ Windows
To download and install software please refer to the relevant documentation for details.
¶ GNU/Linux
Mission Planner is a Windows application. You can use APM Planner on GNU/Linux. To download and install APM Planner please refer to the relevant documentation for details.
You can also run Mission Planner on GNU/Linux under Mono.
Mono, the open source development platform based on the .NET Framework, allows developers to build cross-platform applications with improved developer productivity. Mono’s .NET implementation is based on the ECMA standards for C# and the Common Language In Common Language Infrastructure.
The below instructions show how to install Mission Planner on GNU/Linux using mono.
¶ Add the Mono repository to your system
Ubuntu 18.04 (i386, amd64, armhf, arm64, ppc64el)
sudo apt install gnupg ca-certificates
sudo apt-key adv --keyserver hkp://keyserver.ubuntu.com:80 --recv-keys 3FA7E0328081BFF6A14DA29AA6A19B38D3D831EF
echo "deb https://download.mono-project.com/repo/ubuntu stable-bionic main" | sudo tee /etc/apt/sources.list.d/mono-official-stable.list
sudo apt update
Ubuntu 16.04 (i386, amd64, armhf, arm64, ppc64el)
sudo apt-key adv --keyserver hkp://keyserver.ubuntu.com:80 --recv-keys 3FA7E0328081BFF6A14DA29AA6A19B38D3D831EF
sudo apt install apt-transport-https ca-certificates
echo "deb https://download.mono-project.com/repo/ubuntu stable-xenial main" | sudo tee /etc/apt/sources.list.d/mono-official-stable.list
sudo apt update
¶ Install Mono
sudo apt install mono-complete
Add yourself to dialout group on Ubuntu - be sure to replace username with your actual username in GNU/Linux.
sudo usermod -a -G dialout username
Download the zip version of Mission Planner.
https://firmware.ardupilot.org/Tools/MissionPlanner/
Create folder and extract the zip file.
mkdir ~/missionplanner
unzip -d ~/missionplanner/ MissionPlanner*
Launch Mission Planner.
cd ~/missionplanner
mono MissionPlanner.exe
¶ Connecting
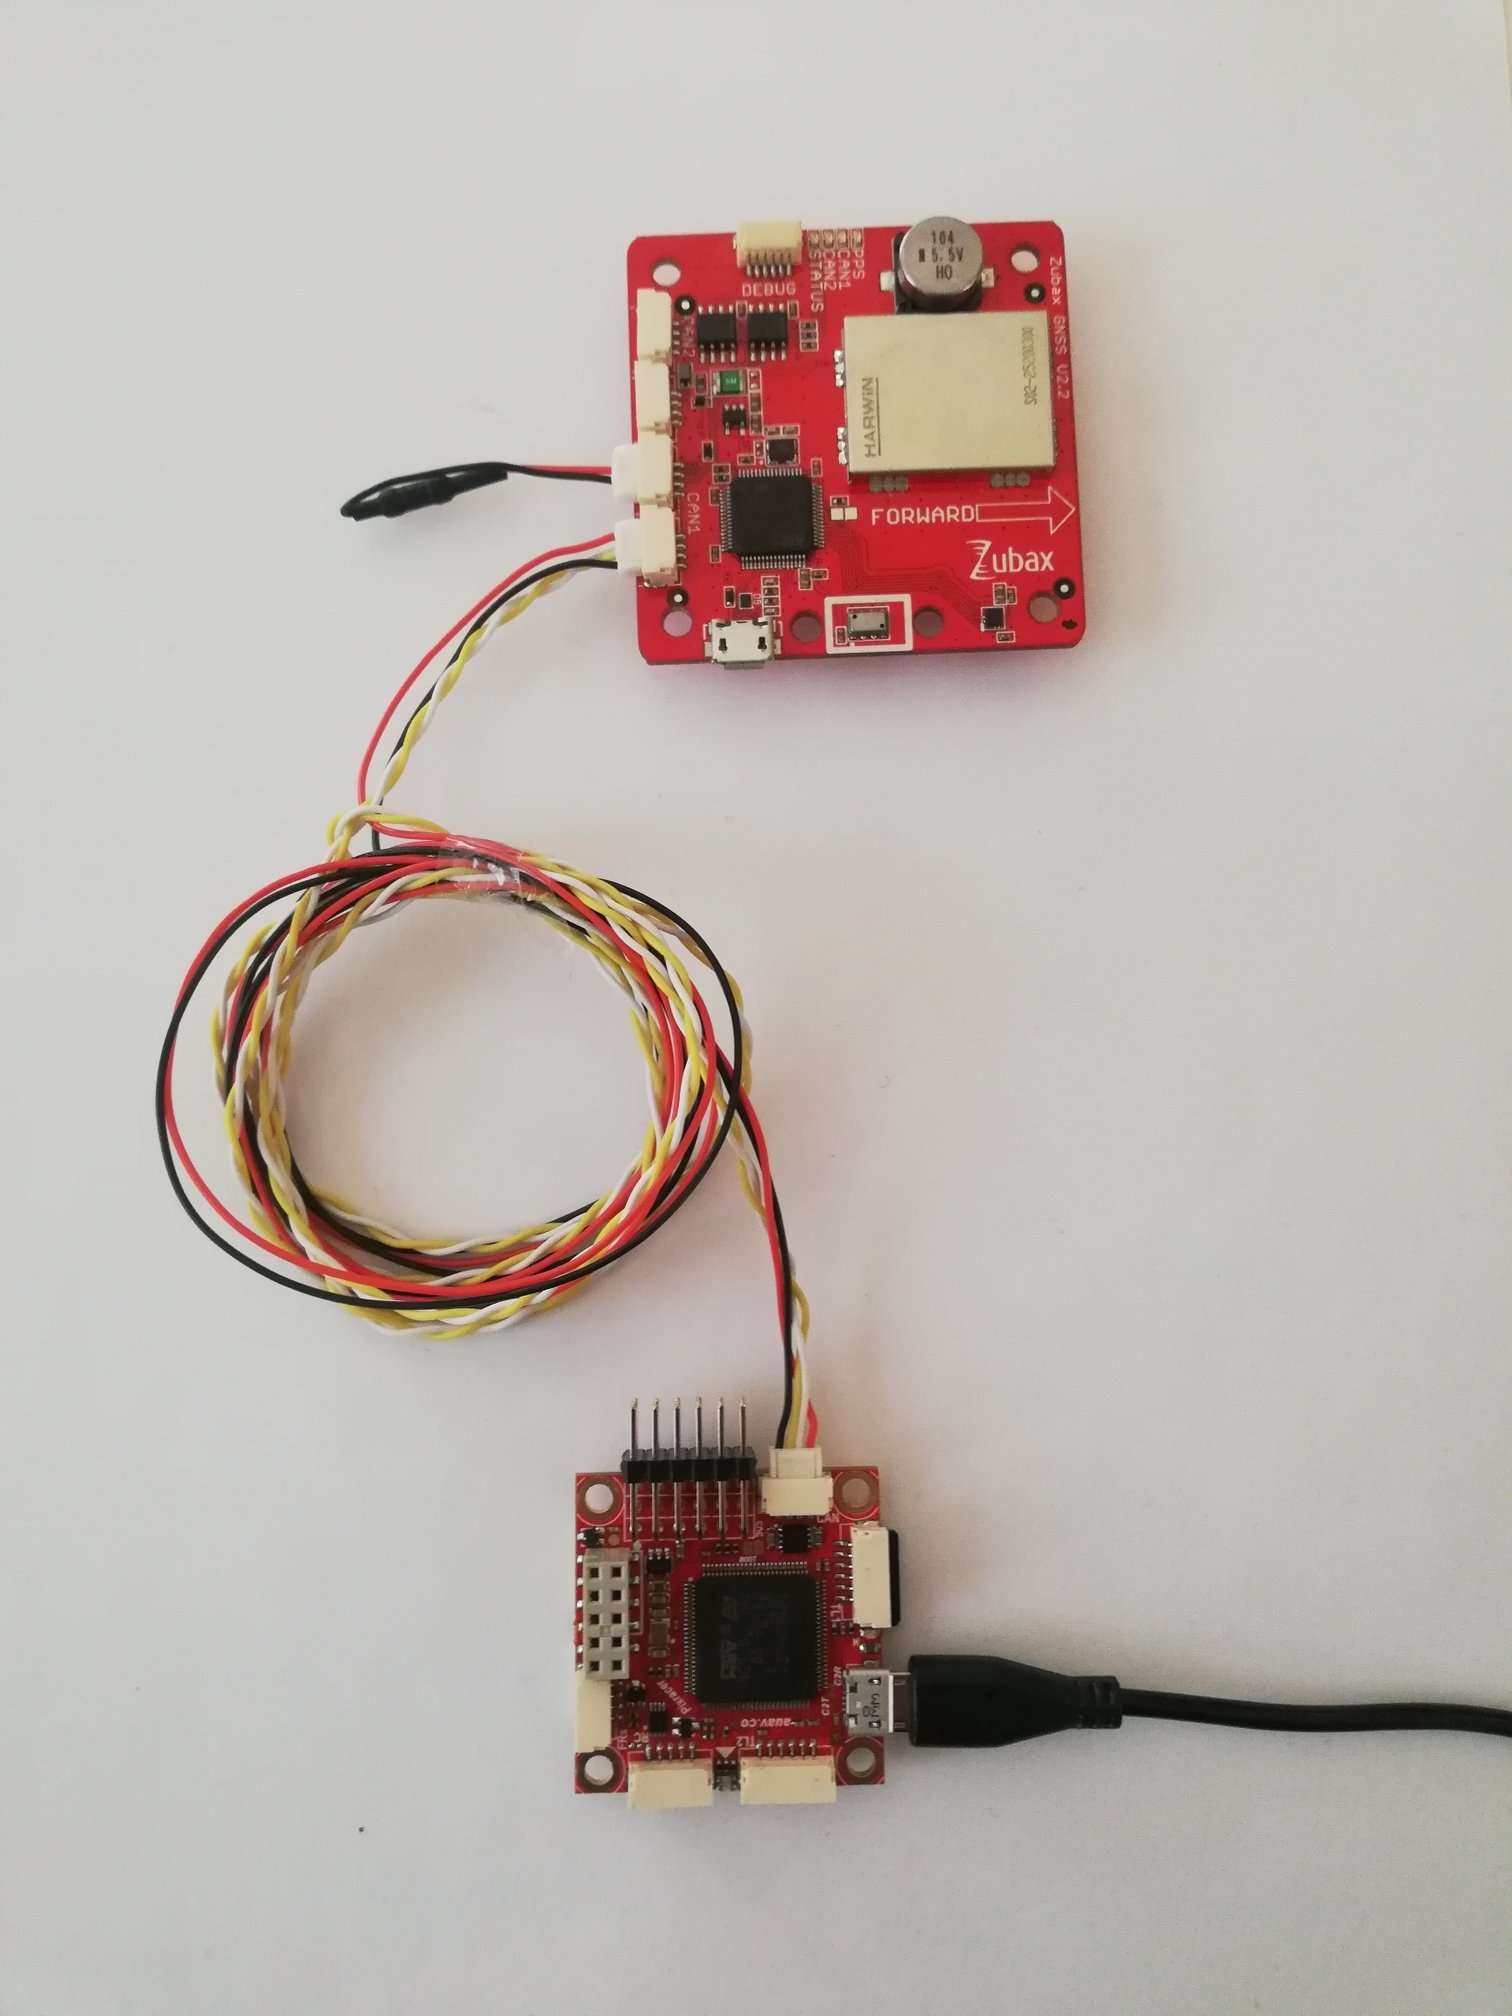
Since Zubax GNSS 2 can be powered directly from the bus, the electrical connections are quite simple:
- Connect Zubax GNSS 2 with Pixhawk using the appropriate cable. In case you’re using a non-redundant CAN interface (which is the only available option for Pixhawk v1), only CAN1 must be used, leaving CAN2 empty.
- Terminate the CAN bus using the termination plug.
¶ Configuring Pixhawk with APM firmware
Open Mission Planner application.

Attach Pixhawk with computer using the micro USB cable and then click on connect button.

Open the tab CONFIGRATIONS then select Full Parameter List and search for CAN parameters.

Turn on CAN and UAVCAN stack by setting the parameters CAN_D1_PROTOCOL and CAN_P1_DRIVER to 1.

In order to make APM receive measurements from an UAVCAN-interfaced GNSS receiver, set the parameter GPS_TYPE to 9.

Click on button Write Params to write all parameters to the controller. Disconnect serial port and reboot flight controller.

GPS will may take several seconds to get locked. You can check the status by clicking on tab FLIGHT DATA.

¶ Compass
GNSS has an onboard compass and barometer attached to the UAVCAN bus. To use the GNSS compass follow these instructions below.
¶ Alignment
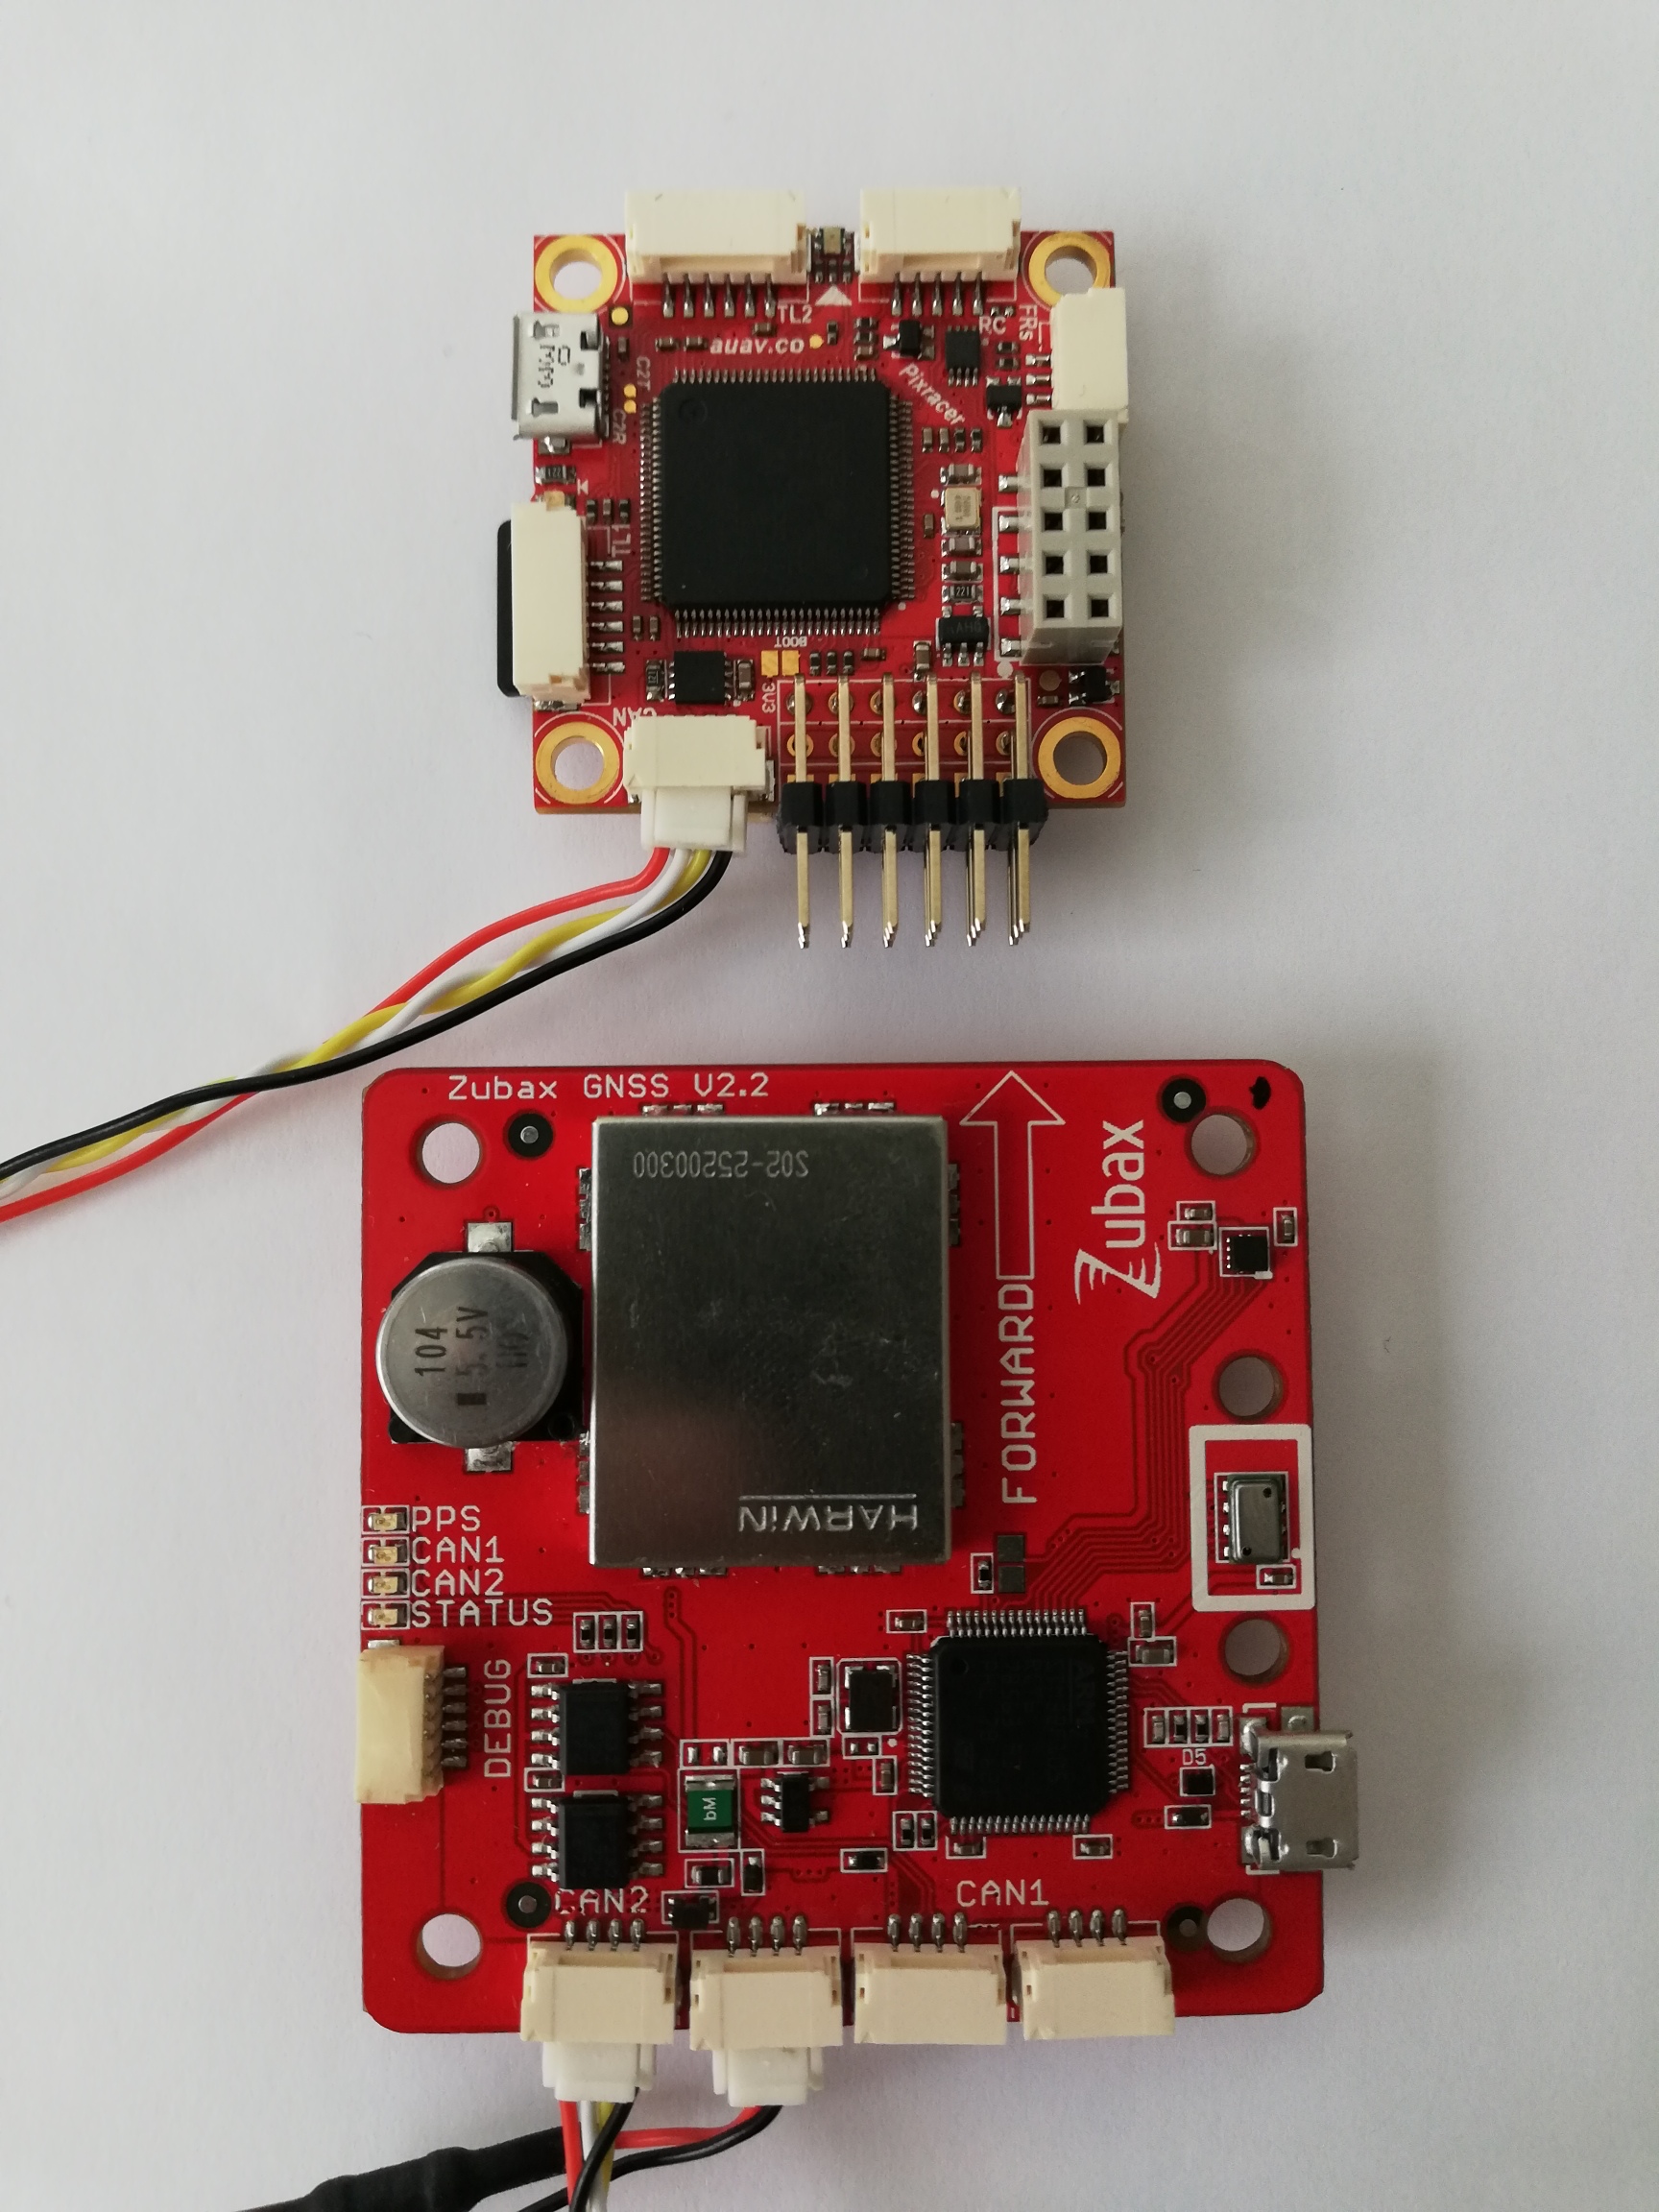
Make sure Zubax GNSS and the autopilot are aligned (use arrow markings) as shown below.
Open the tab INITIAL SETUP then select HW ID and search for compass on UAVCAN bus. As shown in the image below, GNSS compass has ID3.
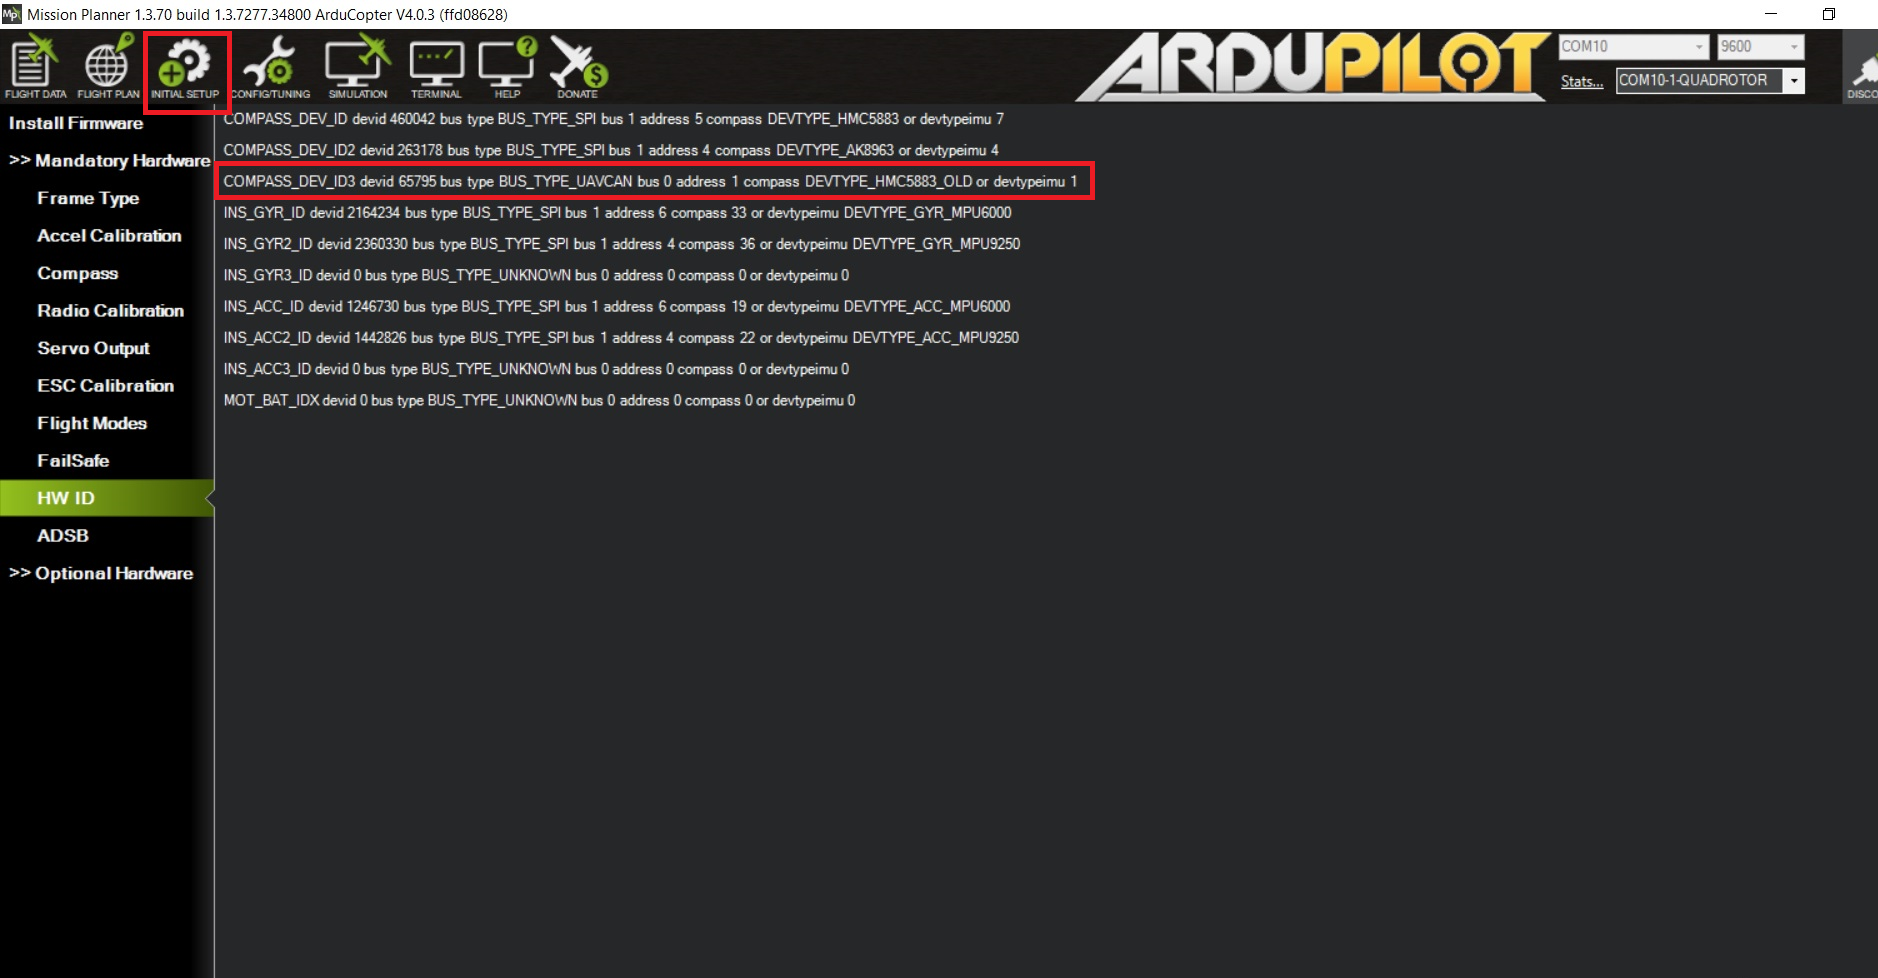
Open the tab INITIAL SETUP then select the compass.
Set Primary Compass to Compass3 and select parameters Use this compass and Externally mounted .
Now perform calibration until you will get indication MAG_CALL_SUCESS as shown below.
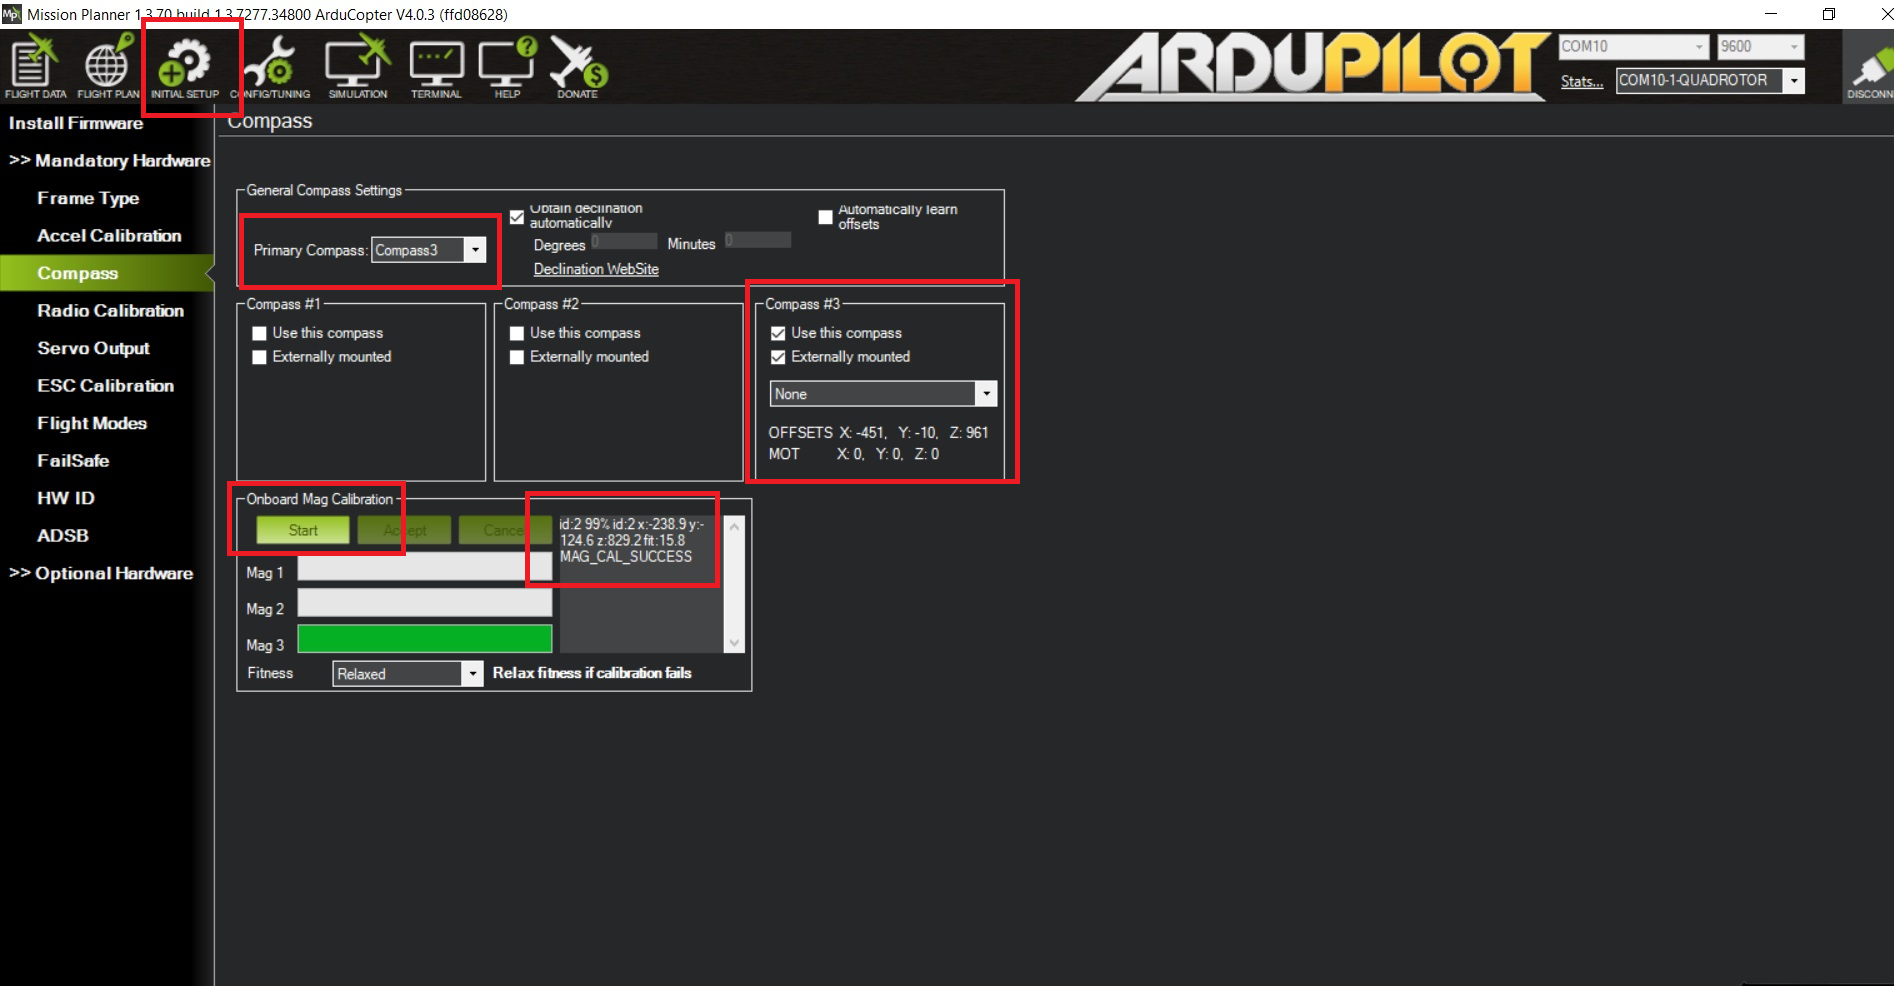
After that your external compass is ready to use.
¶ Barometer
First we need to enable a barometer on GNSS.
¶ Enabling
Zubax GNSS is equipped with a command-line interface (CLI) exposed over a serial port that provides access to the device’s internal command shell. Refer to the relevant documentation for details.
To use command-line interface attach GNSS to computer using a USB interface.
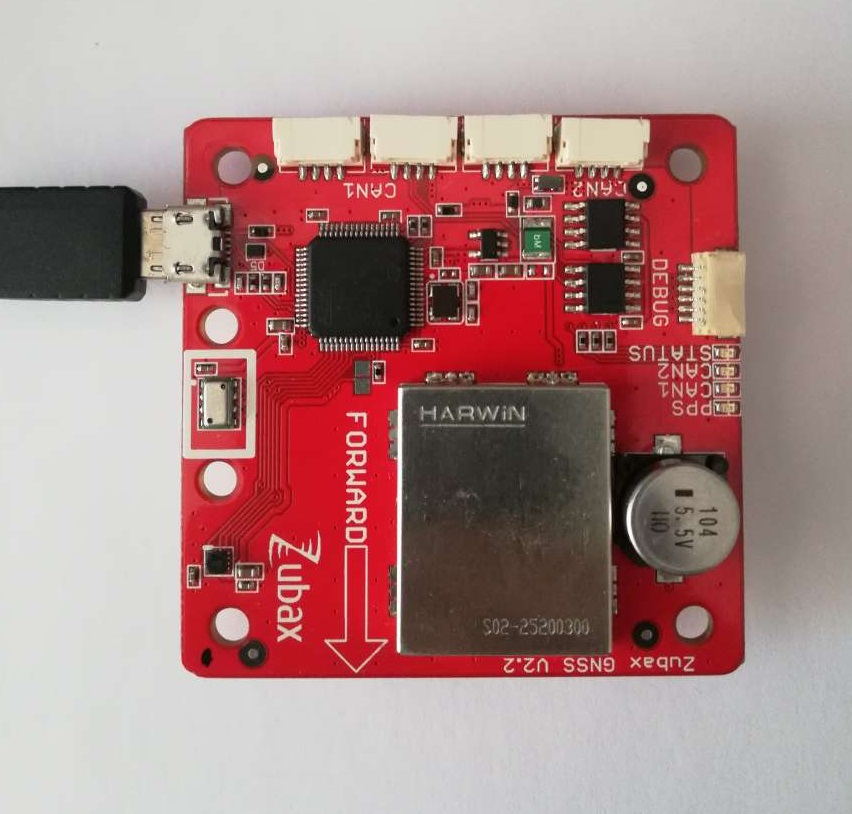
GNSS will appear as COM port.
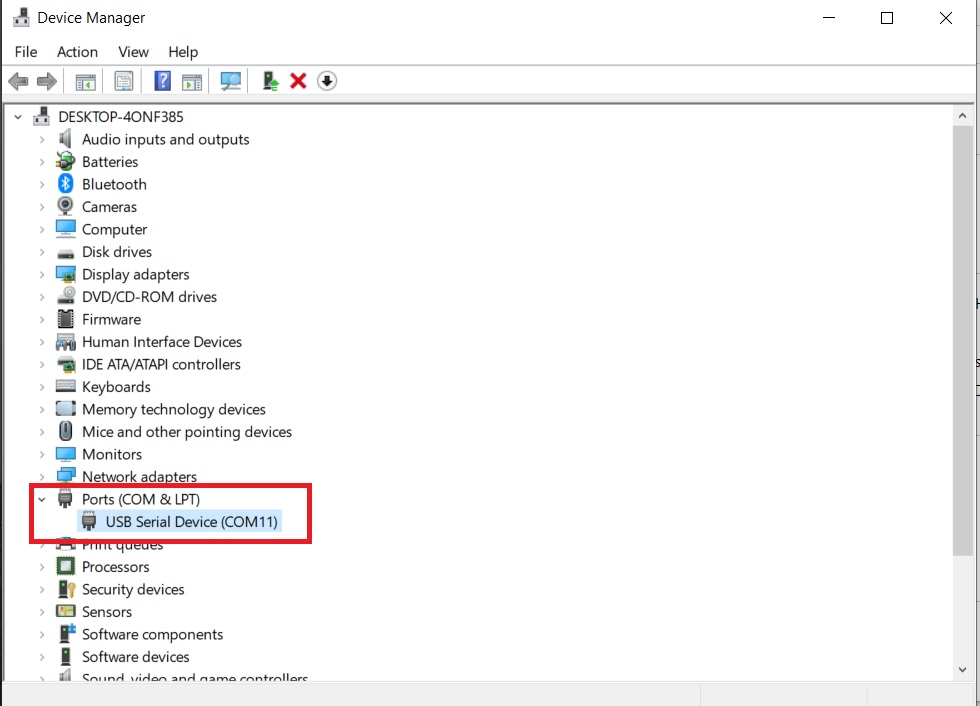
Open COM port under the following configurations.
¶ UART configuration
- Baud rate: 115200
- Word length: 8
- Parity: None
- Stop bits: 1
¶ Terminal configuration
Command-line interface parameters:
- Line ending: CR+LF (0x0D+0x0A,
\r\n) - Local echo: Off
- Local line editing: Off
Execute the following:
/* uavcan.pubp-pres "set uavcan.pubp-pres <value>"
Publication interval of uavcan.equipment.air_data.StaticPressure. Zero means disabled.
Default value: 0
Units: Microsecond */

cfg set uavcan.pubp-pres 100
cfg save
reboot
¶ Configuring
Once enabled Mission planner will automatically detect a barometer on GNSS and set it as a primary barometer.
To check the number of barometers on board. Open the tab FLIGHT DATA then select tab Status. It will appear that two barometers are detected. One barometer is on the autopilot and other is on the GNSS module.
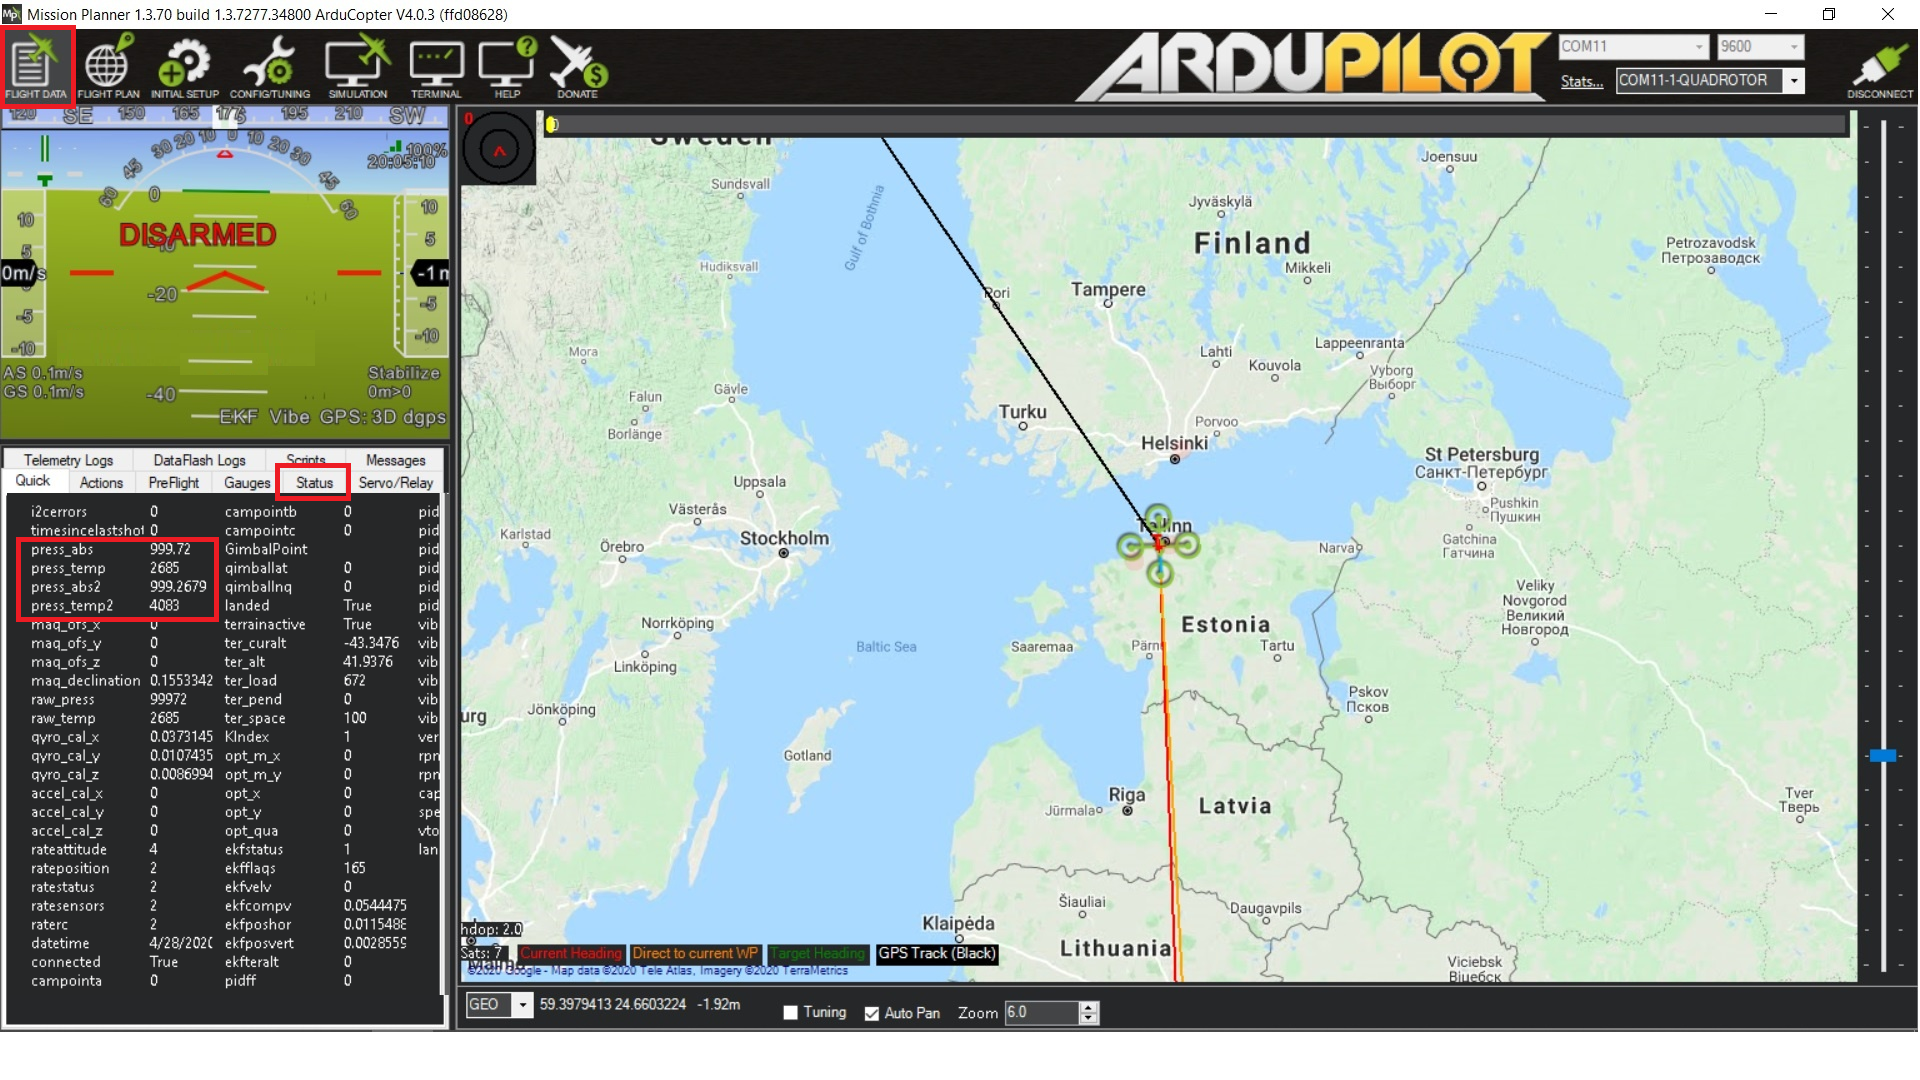
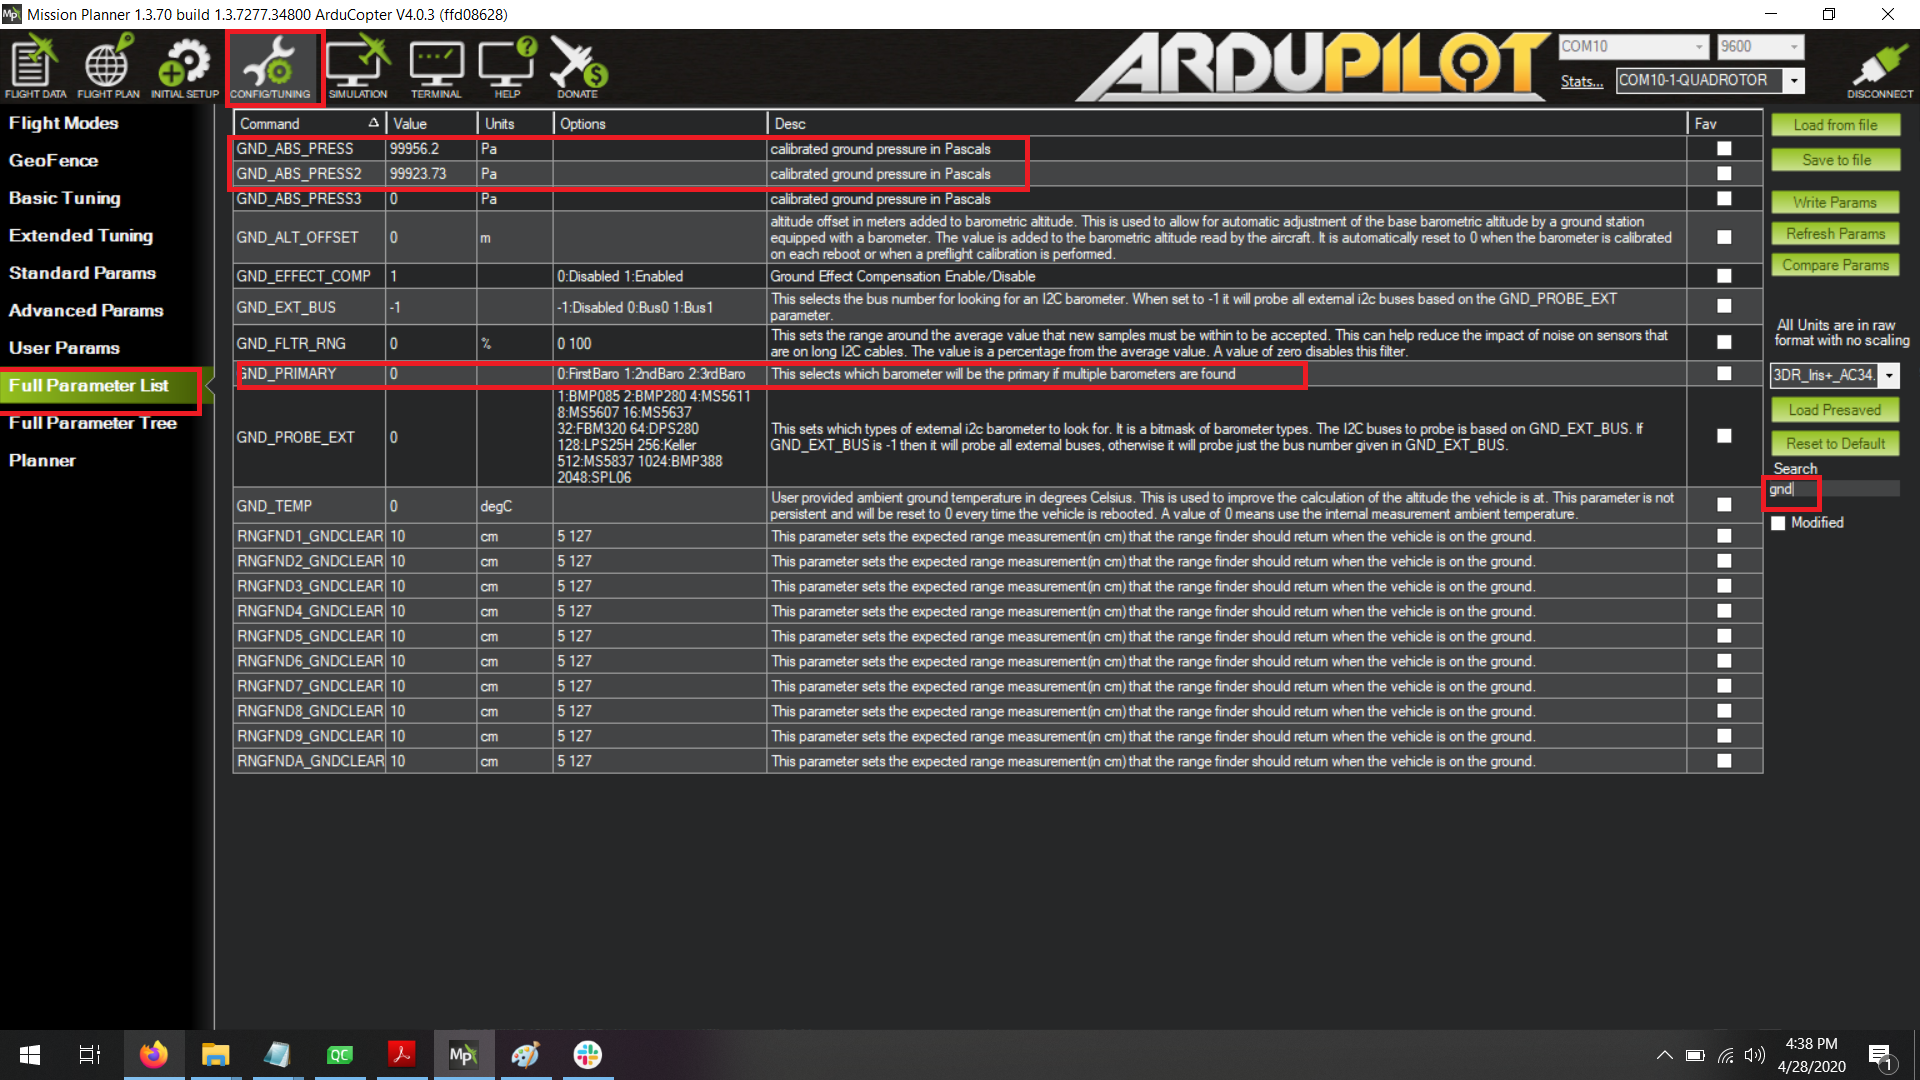
To set other barometer as the primary one. Change the parameter GND_PRIMARY to 1.
¶ MAVLink Console
ArduPilot supports the MAVLink protocol for communication with Ground Stations and Companion Computers. You can use Mavlink Inspector for debugging or checking the status of a vehicle. Refer to the relevant documentation for details.