¶ Using Telega-based controllers with ArduPilot
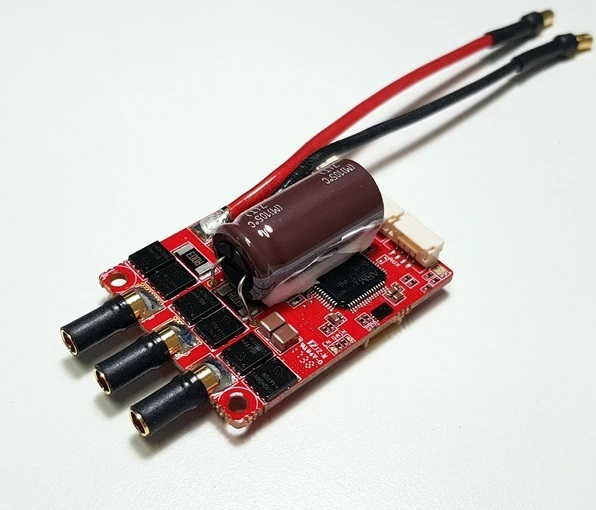
This tutorial demonstrates how to integrate Telega-based controllers with ArduPilot based flight controllers using ArduPilot mission planner. The documentation for ArduPilot is available at ardupilot.org.
UAVCAN is supported in the following APM firmwares:
- ArduPlane 3.2.1 and newer
- ArduCopter 3.3rc1 and newer
This tutorial is demonstrated on APM firmware v4.1.0-dev. Myxa telemetry is not supported on lower versions.
¶ Software Installation
Mission Planner is a ground control station for Plane, Copter and Rover. It is compatible with Windows and can be used on GNU/Linux using mono. Mission Planner can be used as a configuration utility or as dynamic control supplement for your autonomous vehicle.
¶ Windows
To download and install software please refer to the relevant documentation for details.
¶ GNU/Linux
Mission Planner is a Windows application. You can use APM Planner on GNU/Linux. To download and install APM Planner please refer to the relevant documentation for details.
You can also run Mission Planner on GNU/Linux under Mono.
Mono, the open source development platform based on the .NET Framework, allows developers to build cross-platform applications with improved developer productivity. Mono’s .NET implementation is based on the ECMA standards for C# and the Common Language In Common Language Infrastructure.
The below instructions show how to install Mission Planner on GNU/Linux using mono.
¶ Add the Mono repository to your system
Ubuntu 18.04 (i386, amd64, armhf, arm64, ppc64el)
sudo apt install gnupg ca-certificates
sudo apt-key adv --keyserver hkp://keyserver.ubuntu.com:80 --recv-keys 3FA7E0328081BFF6A14DA29AA6A19B38D3D831EF
echo "deb https://download.mono-project.com/repo/ubuntu stable-bionic main" | sudo tee /etc/apt/sources.list.d/mono-official-stable.list
sudo apt update
Ubuntu 16.04 (i386, amd64, armhf, arm64, ppc64el)
sudo apt-key adv --keyserver hkp://keyserver.ubuntu.com:80 --recv-keys 3FA7E0328081BFF6A14DA29AA6A19B38D3D831EF
sudo apt install apt-transport-https ca-certificates
echo "deb https://download.mono-project.com/repo/ubuntu stable-xenial main" | sudo tee /etc/apt/sources.list.d/mono-official-stable.list
sudo apt update
¶ Install Mono
sudo apt install mono-complete
Add yourself to dialout group on Ubuntu - be sure to replace username with your actual username in GNU/Linux.
sudo usermod -a -G dialout username
Download the zip version of Mission Planner.
https://firmware.ardupilot.org/Tools/MissionPlanner/
Create folder and extract the zip file.
mkdir ~/missionplanner
unzip -d ~/missionplanner/ MissionPlanner*
Launch Mission Planner.
cd ~/missionplanner
mono MissionPlanner.exe
¶ Required parts
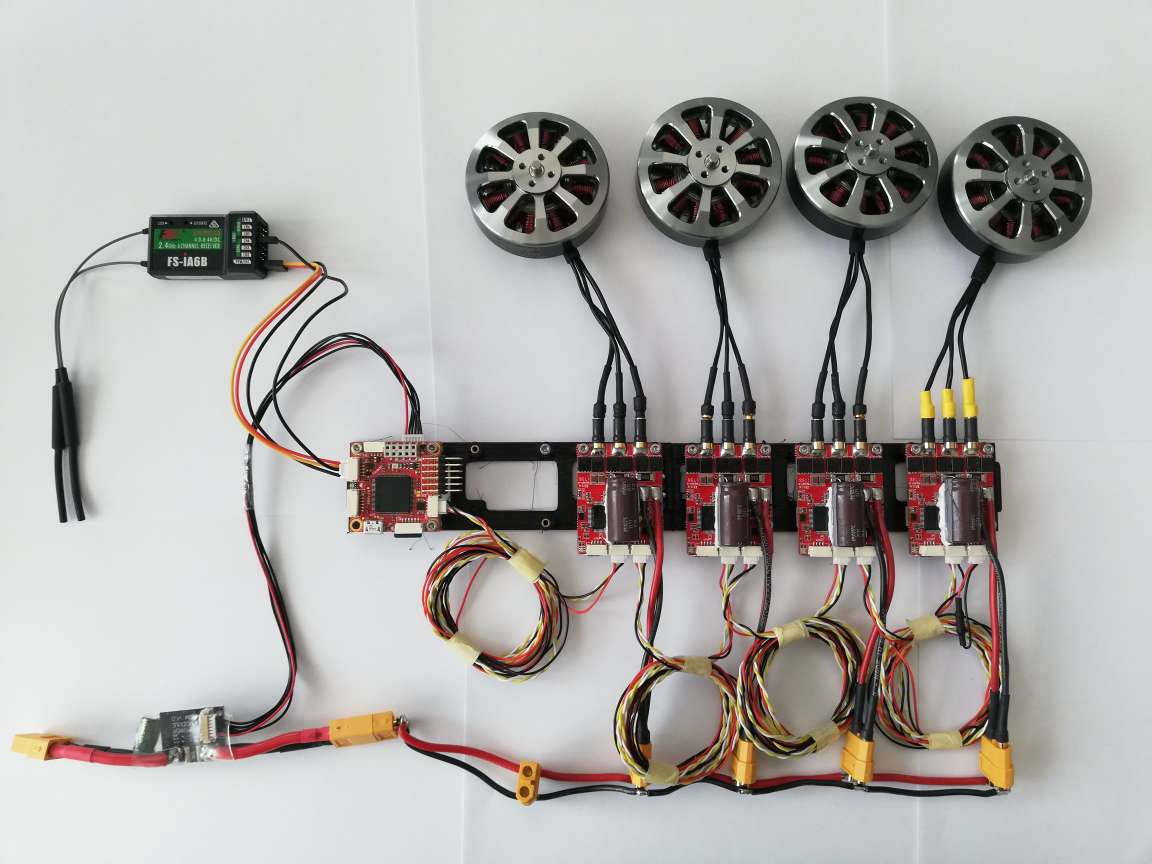
The tutorial is set up for quadcopter but it is applicable for all types of frames. To follow along, the following parts will be needed:
- 4 x Telega-based controllers
- 4 x UAVCAN Micro patch cable (or an adapter cable, depending on the type of CAN connectors used in the autopilot hardware).
- 1 x UAVCAN Micro termination plug.
- 1 x Zubax Babel
Please contact your supplier for ordering information. Alternatively, customers can choose to manufacture the needed cables/plugs on their own in order to suit some custom needs, in which case they should refer to the relevant documentation for details.
¶ Connecting
Connect all of the on-board UAVCAN devices into a chain and make sure the bus is terminated at the end nodes. The order in which the ESCs are connected/chained does not matter.
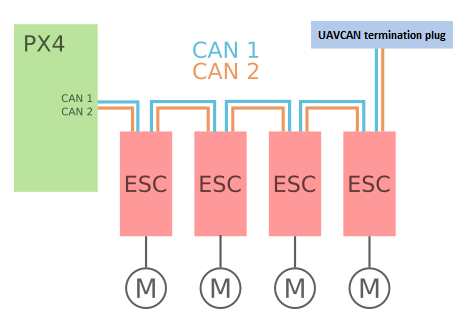
Image source [https://dev.px4.io/v1.9.0/en/uavcan/index.html]
¶ Configuring ESC
UAVCAN devices are generally Plug'n'Play you will still need to enumerate (assign index/number) each of the ESC used in your vehicle and set their direction so that they can be identified/controlled by ArduPilot Mission Planner. To enumerate the ESC you can either use the UAVCAN GUI tool via UAVCAN bus or Kucher via USB link (for myxa only).
¶ UAVCAN
Connect all ESCs into a chain with Babel.
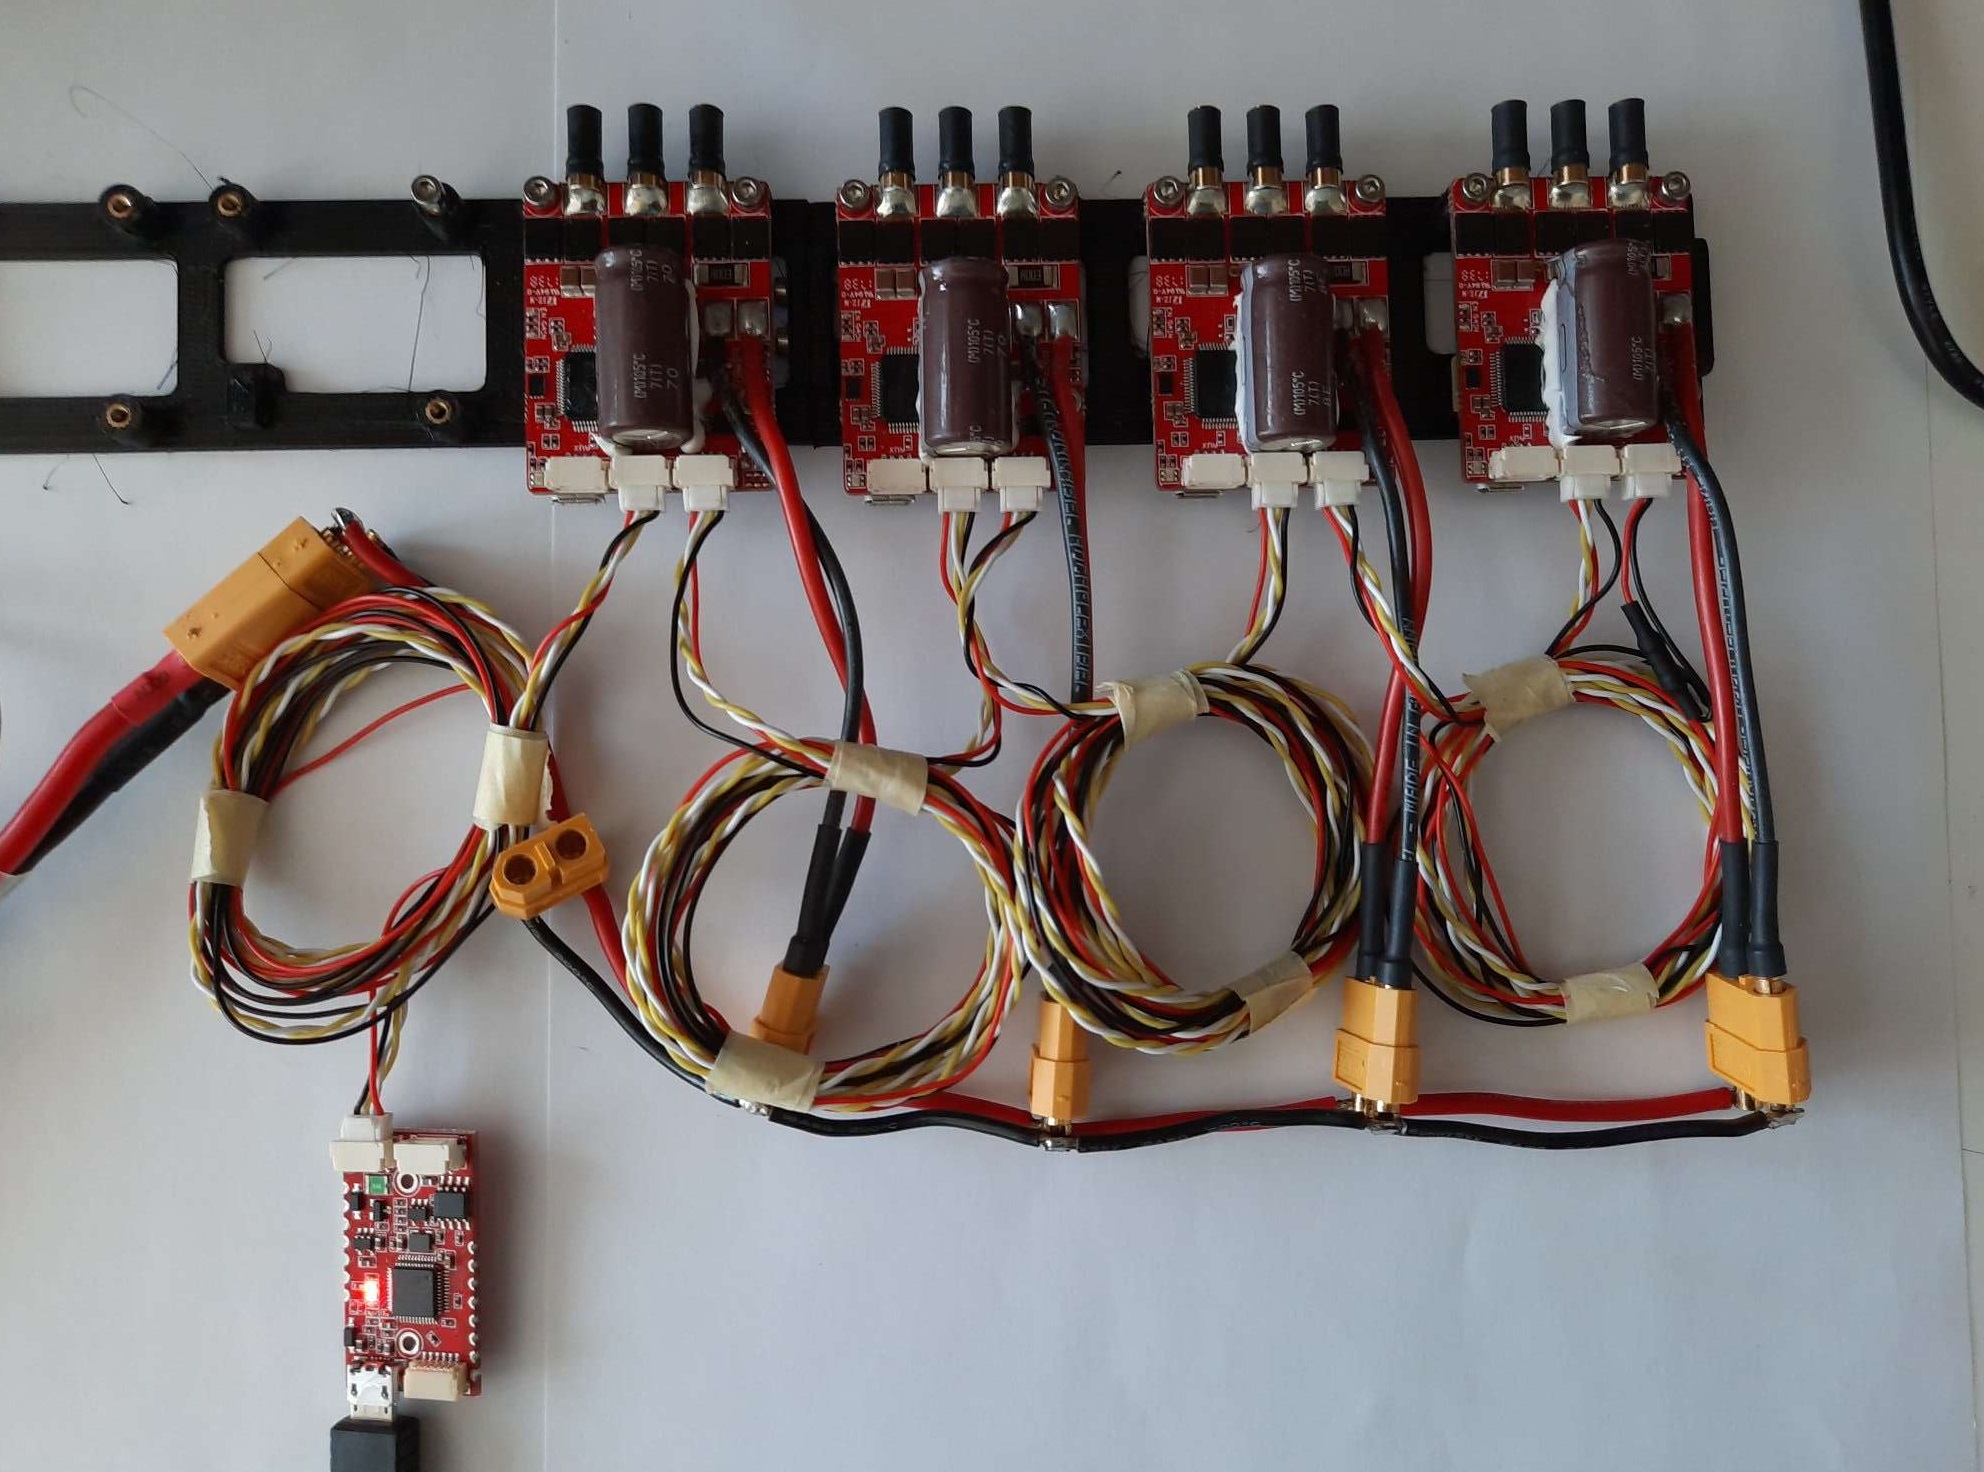
Open the UAVCAN GUI tool, apply local node ID and then launch the dynamic node ID allocation server.

All connected ESCs will appear as nodes. Double click on the node to open its properties window.

Click on button Fetch All to fetch all parameters of the node.
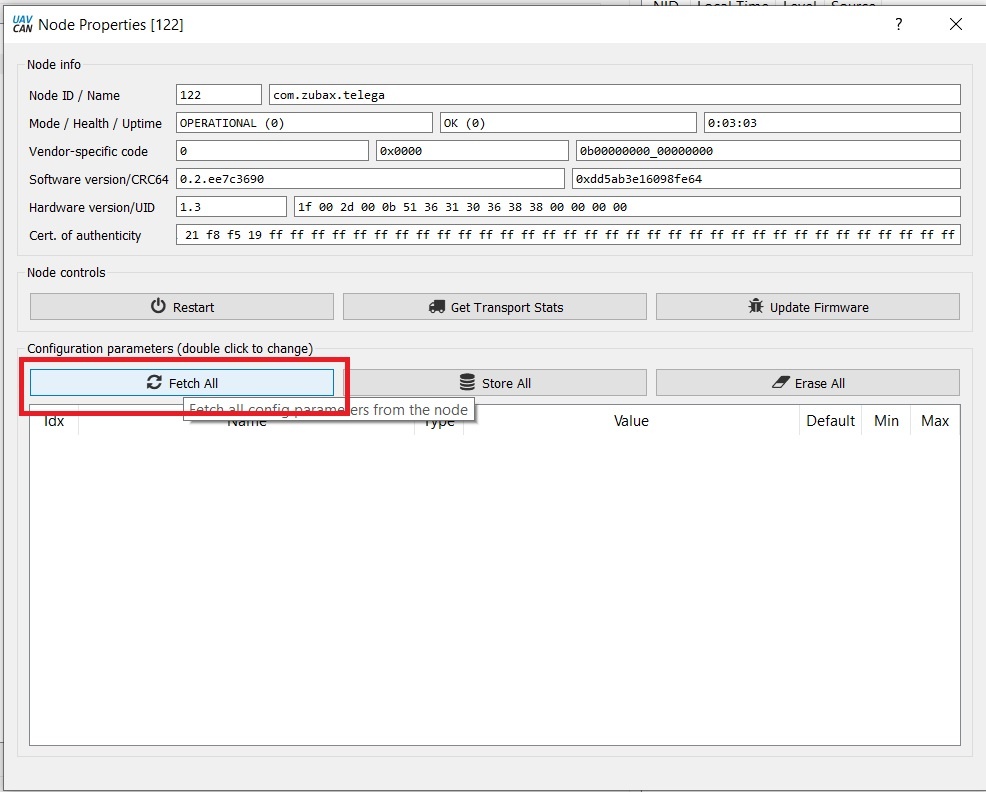
Enumerate ESC and set the direction of the motor by writing into the following configuration parameters:
uavcan.esc_indexuavcan.esc_revrs

Repeat this process for all other ESCs.
¶ USB
To download and install Kucher please refer to the relevant documentation for details.
Connect Myxa with a computer using a micro USB cable.
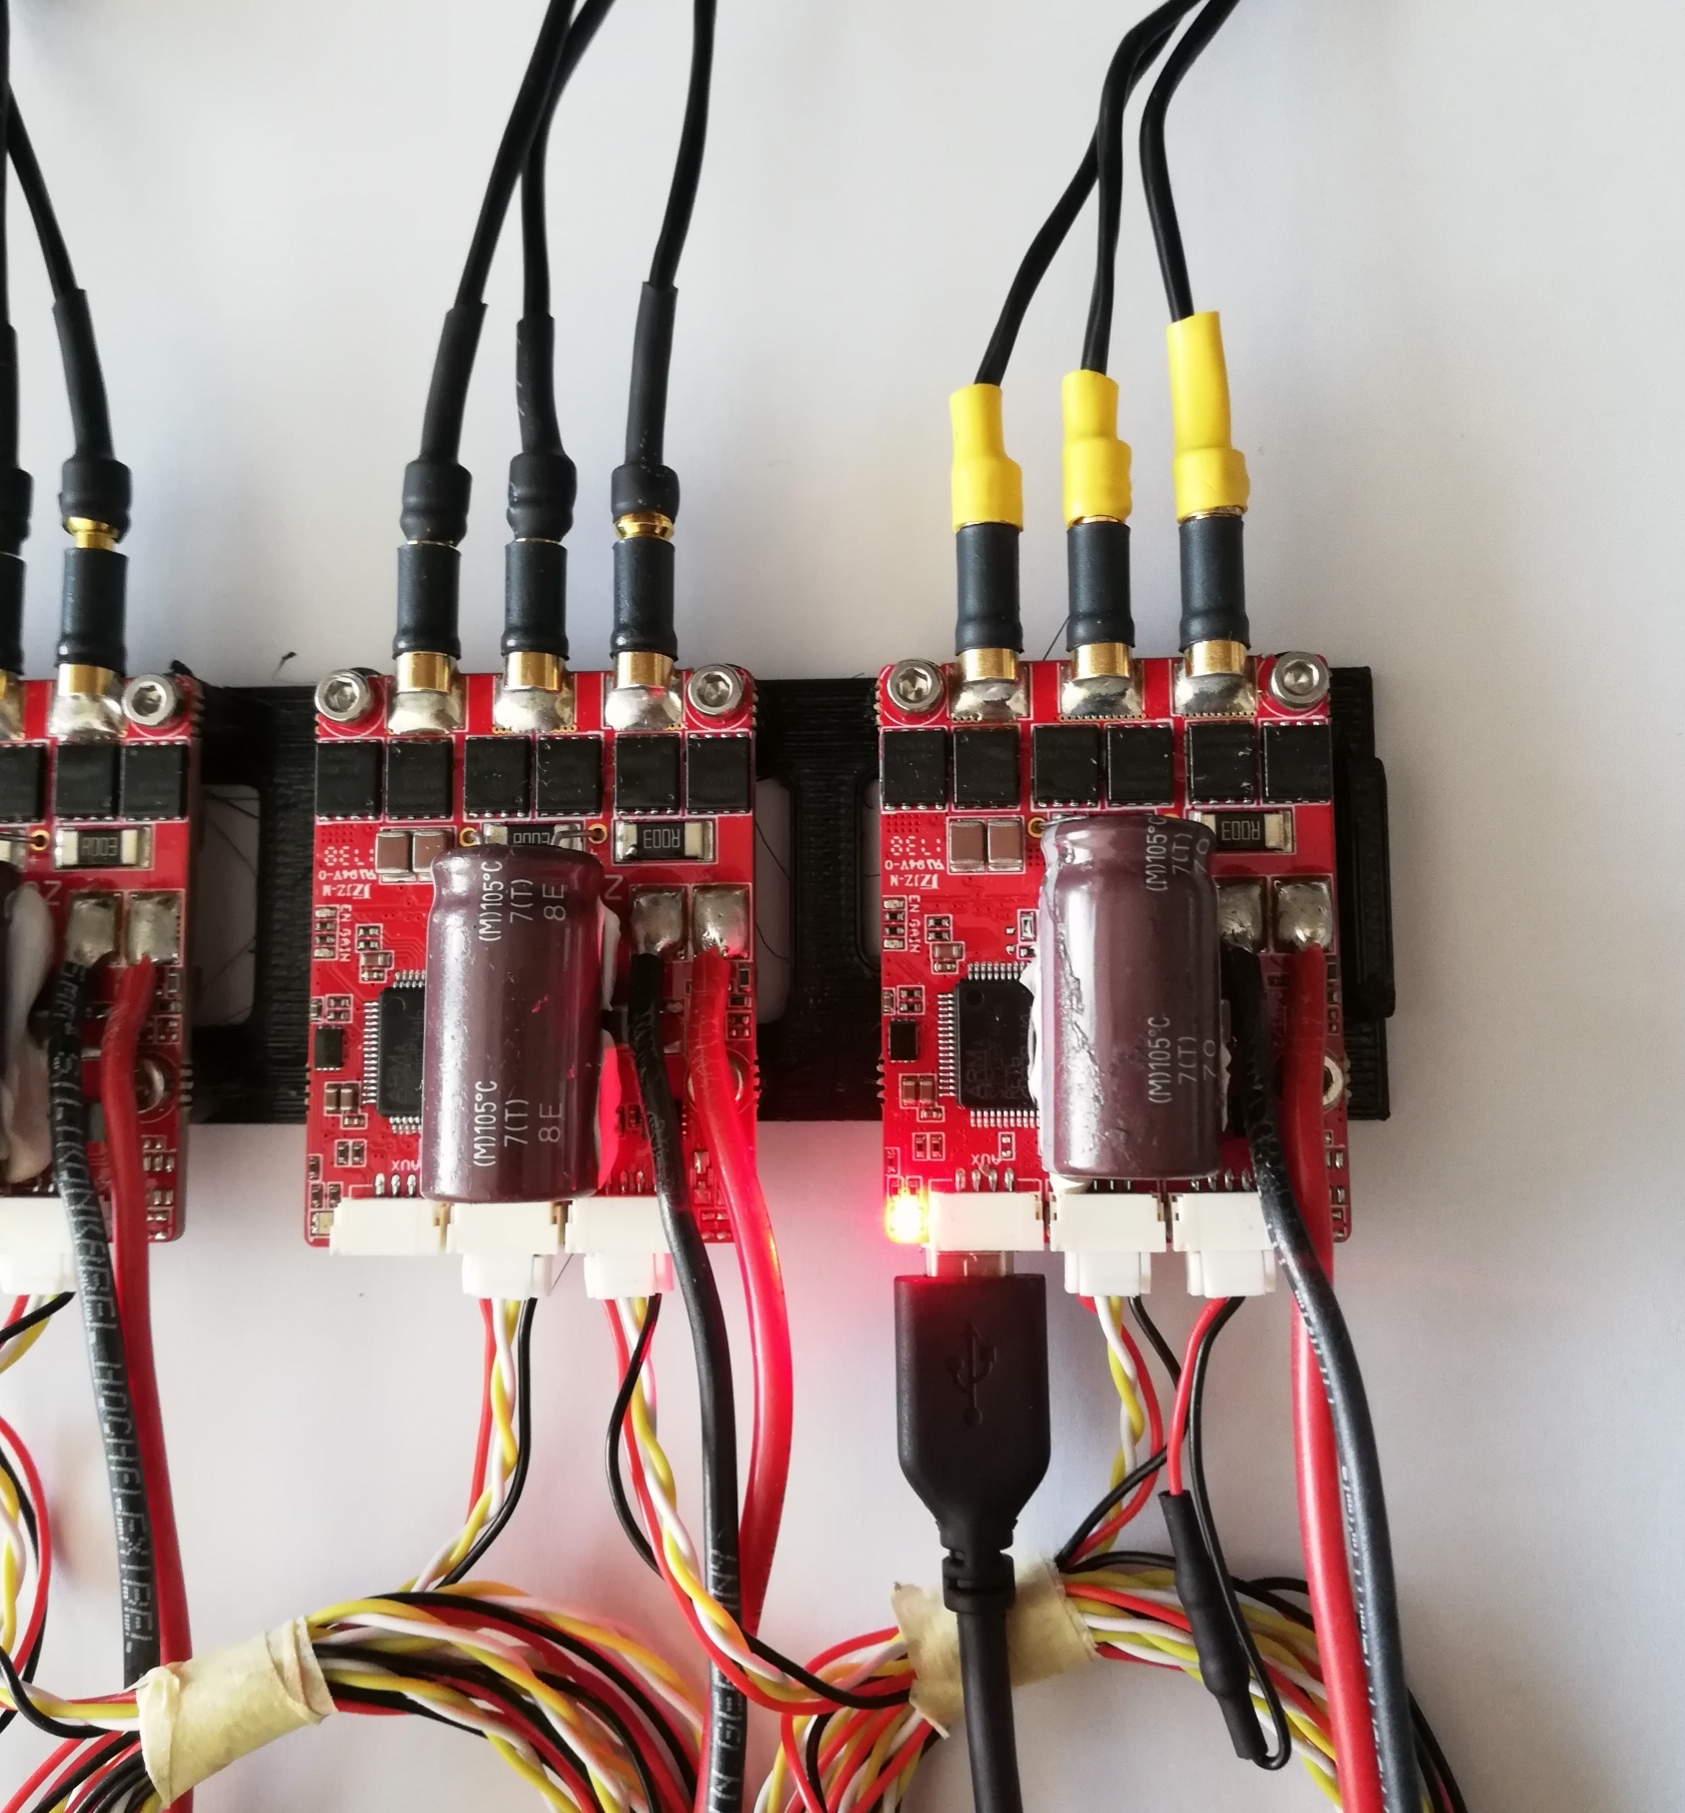
Open Kucher, select Port and press Connect button to establish a link between Kucher and Myxa ESC.

Enumerate ESC and set the direction of the motor by writing into the following configuration parameters:
esc_indexesc_revrs
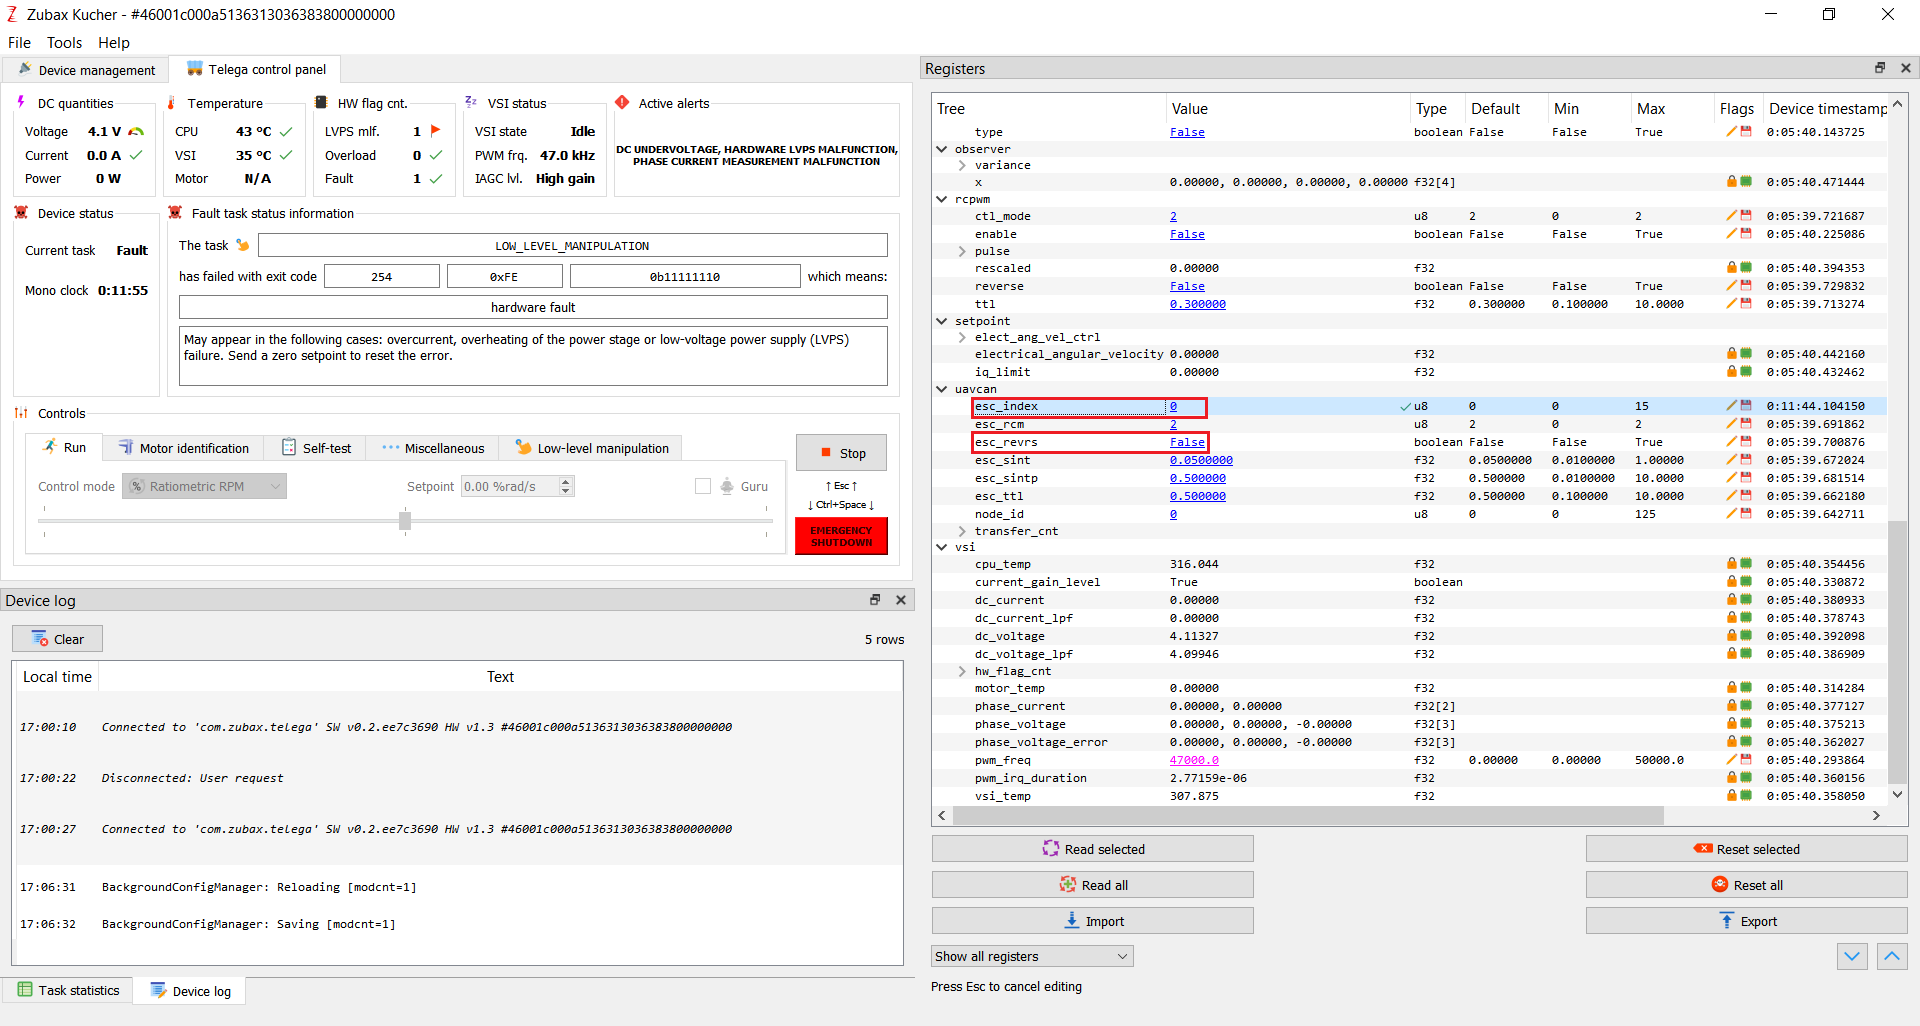
Repeat this process for all other ESCs.
¶ Configuring the Pixhawk with APM firmware
Open Mission Planner application.

Attach Pixhawk with computer using the micro USB cable and then click on connect button.

Open the tab CONFIGURATIONS then select Full Parameter List and search for CAN parameters.
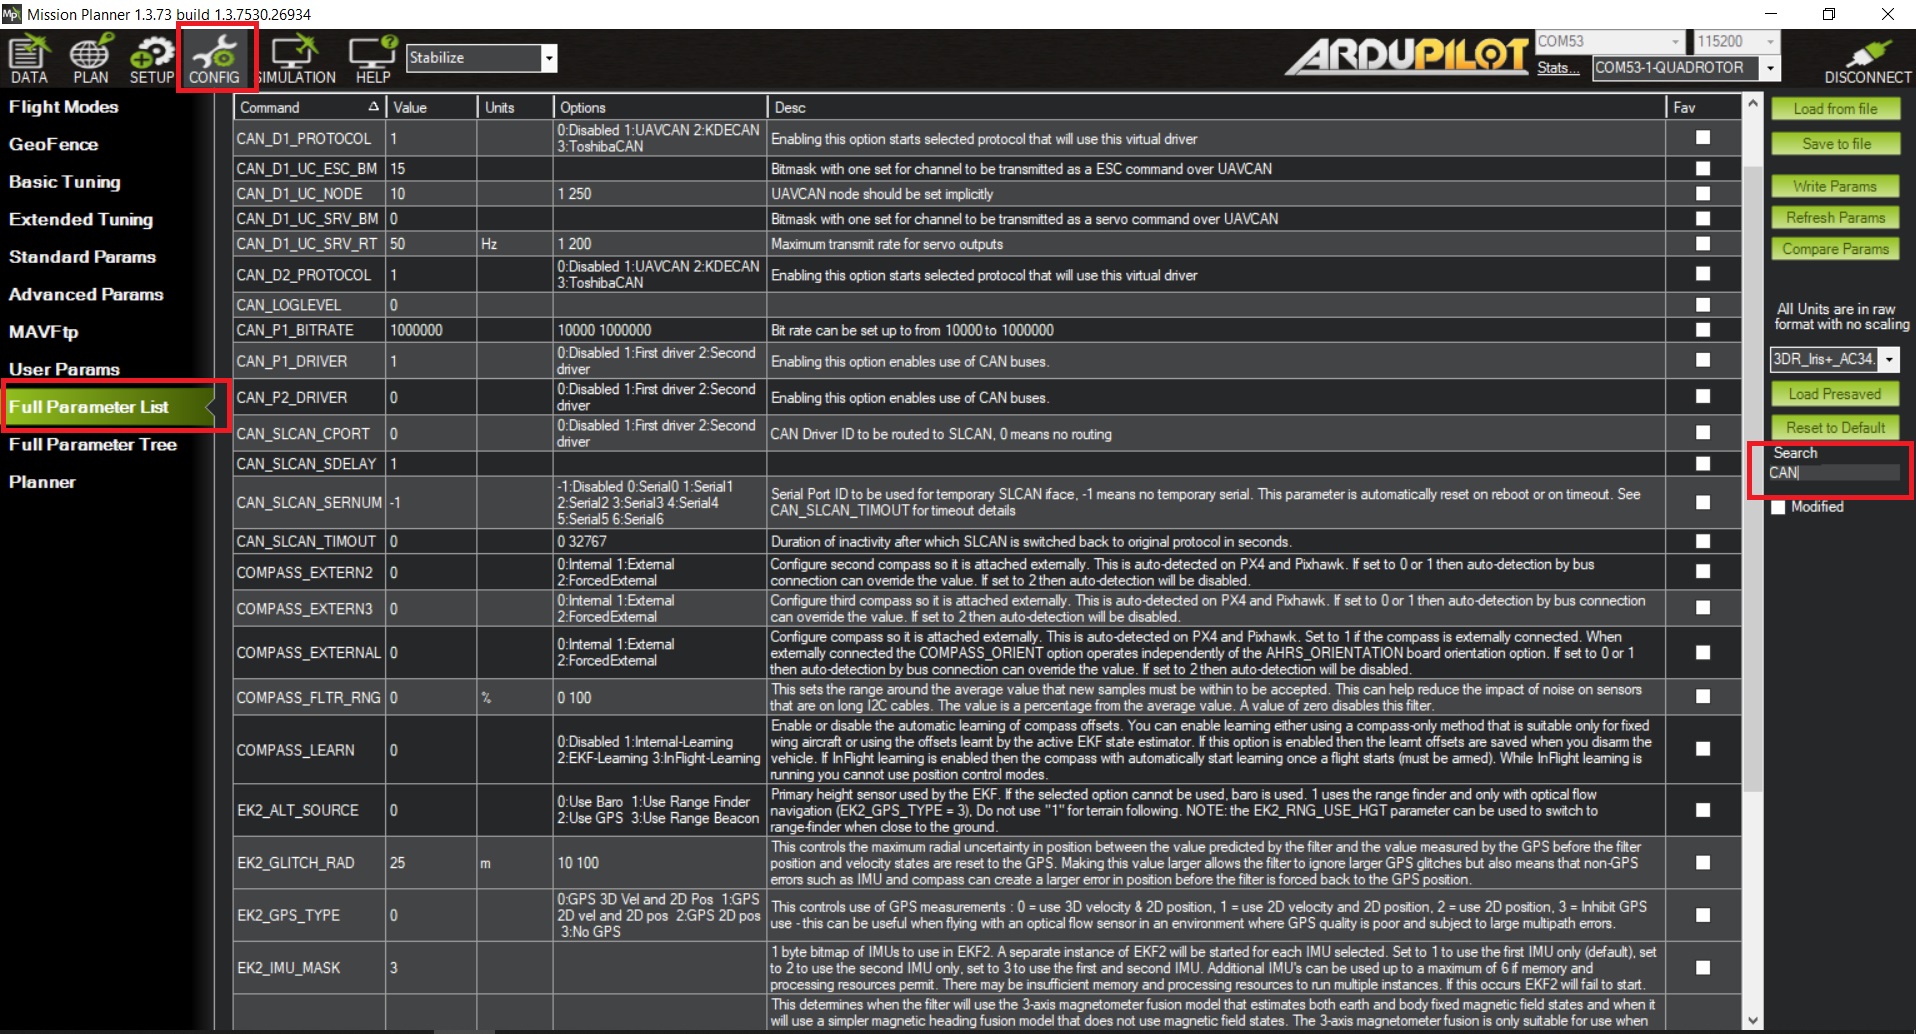
Turn on CAN and UAVCAN stack by setting the parameters CAN_D1_PROTOCOL and CAN_P1_DRIVER to 1.

Bitmask the number of attached ESC to RC out channels to be transmitted as ESC over UAVCAN by setting the parameter CAN_D1_UC_ESC_BM

Click on button Write Params to write all parameters to the controller. Disconnect serial port and reboot flight controller.

After that, your Myxa is ready to use. The CAN status LED on Myxa will turn on solid green. You can use ESC telemetry for debugging or checking the status of the attached Myxa. For that open, the tab FLIGHT DATA then select tab Status.

Tip
By default, safety switch parameters and pre arm flight checks are enabled. Failing to accomplish any one of the conditions will result in unable to arm the controller or mission planner will not unlock myxa for safety reasons.